I bought this dress form a few weeks back. I knew I wanted to play with it but, it was one of those moments where I was afraid I'd mess it up. I often buy things I know I want to do and then fuss and fuss over messing them up. Meanwhile I tell all my craft Friends when their starting out there is no messing things up just learning.. sooo a few ideas and a glass of wine later, I dove right in. I took pictures along the way to serve as a bit of a tutorial for you all. Dress forms are all the rage right now in the crafting world and I've seen them turned into moo much; jewelry holders, stick pin cushions, etc. I just love the eclectic feel of it all.
 |
| Now I stained it white, not knowing the full direction it was going in, however I really didn't need to since I later decided to cover it. |
 |
| I crinkled up some Tim Holtz glassine paper and then inked them up with the new Christmas distress inks. |
 |
| Great way to cut tulle, is to wrap it around a piece of cardboard and then cut on both ends, this can be done on little sets as well as something like a little girls tutu. Makes for great evenly cut pieces. |
 |
| I then glued it to a piece of paper. |
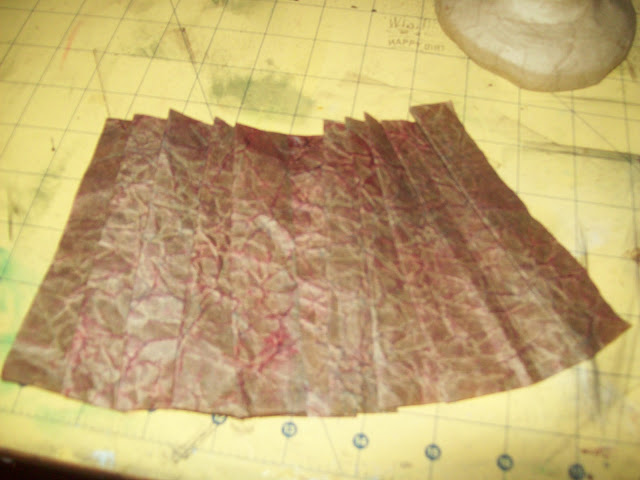 |
| after the ink was done drying, I pleated the glassine. |
 |
| I added some lace to the top of the tulle and then clipped it to ensure it dries well. |
 |
| I tore pieces of canvas and then misted it, crumpled it up and let it dry. I didn't go for even coverage just some added color. |
 |
| Adhere the pieces to the form. |
 |
| Cover the form. |
 |
| Wrap the glassine around the form. |
 |
| I added the tutu then. And a cute stick pin, I later removed. I also, inked up the tutu a bit and added another piece of lace to it. I then took the heat gun to the skirt a bit to make it a bit less poofy! |
 |
| I then put together a few jump rings and some misc. charms and things. |
 |
| I used stick pins through the form to attach the fun metals charms. |
 |
| I then added some tattered angels mists along the tears of the canvas and then spritzed it with water. Look at the below pic for the results. |


